BMW 640i Bedienungshandbuch
Stöbern Sie online oder laden Sie Bedienungshandbuch nach Autos BMW 640i herunter. BMW 640i Owner's Manual Benutzerhandbuch
- Seite / 251
- Inhaltsverzeichnis
- LESEZEICHEN
- THE BMW 6 SERIES COUPE 1
- 6 Series 3
- Contents 9
- Additional sources of 10
- Vehicle features and options 10
- Status of the Owner's 11
- For your own safety 11
- Data memory 12
- Event Data Recorder EDR 13
- Vehicle identification 13
- Reporting safety defects 13
- For Canadian customers 14
- Seite 11 15
- All around the steering wheel 18
- Seite 15 19
- All around the center console 20
- All around the roofliner 21
- Control elements at a glance 22
- Operating concept 23
- Seite 20 24
- Touchpad 25
- Example: setting the clock 25
- Status information 26
- Split screen 27
- Programmable memory 27
- Deleting personal in the 28
- Entering letters and numbers 28
- Seite 25 29
- Voice activation system 30
- Seite 27 31
- Environmental conditions 32
- Seite 30 34
- Seite 31 35
- Controls 37
- Opening and closing 38
- Personal Profile 39
- Seite 36 40
- Using the remote control 41
- Seite 38 42
- Without remote control 43
- Trunk lid 44
- Comfort Access 45
- Adjusting 46
- Seite 43 47
- Alarm system 48
- Power windows 49
- Roller sunblind 50
- Glass sunroof, powered with 50
- Seite 47 51
- Seite 48 52
- Adjustments in detail 54
- Thigh support 54
- Multifunctional seat 54
- Lumbar support 54
- Backrest width 54
- Seite 51 55
- Front headrests 57
- Entering the rear 58
- Seat, mirror, and steering 59
- Seite 56 60
- Steering wheel 61
- Storing the position 62
- Assistance getting in and out 62
- Steering wheel heating 62
- Transporting children safely 63
- Seite 60 64
- LATCH child restraint system 65
- Seite 62 66
- Start/Stop button 67
- Starting the engine 68
- Engine stop 68
- Parking brake 70
- Seite 67 71
- Seite 68 72
- Turn signal, high beams 73
- Washer/wiper system 74
- Seite 71 75
- Washer fluid 76
- Kickdown 77
- Engaging D, R and N 77
- Engaging P 77
- Seite 74 78
- Seite 75 79
- Seite 76 80
- Displays 81
- ECO PRO displays 83
- Sport displays 84
- Check Control 85
- Orange lights 86
- Yellow lights 86
- Green lights 87
- Seite 84 88
- Show/reset kilometers 89
- Current fuel consumption 90
- Energy recovery 91
- Service requirements 91
- Gear shift indicator 92
- Speed limit detection 92
- Selection lists in the 93
- On-board computer 94
- Speed warning 95
- Settings on the Control 96
- Head-up Display 97
- Seite 94 98
- Displays Controls 99
- Overview 100
- Parking lights/low beams 100
- Adaptive Light Control 101
- High-beam Assistant 102
- Interior lights 103
- Fog lights 103
- Instrument lighting 103
- Seite 100 104
- Knee airbag 106
- Protective action 106
- Airbag system malfunctioning 106
- Seite 103 107
- Tire Pressure Monitor TPM 108
- Seite 105 109
- Normal tires 110
- Run-flat tires 110
- System limits 111
- Malfunction 111
- FTM Flat Tire Monitor 112
- Intelligent Safety 114
- Front-end collision warning 115
- Seite 112 116
- Seite 113 117
- Seite 115 119
- Pedestrian warning 120
- Pedestrian warning with city 120
- General information 121
- Detection range 121
- At a glance 121
- Button in the vehicle 121
- Seite 118 122
- Night Vision with Pedestrian 123
- Seite 120 124
- Adjustments via the iDrive 125
- Lane departure warning 126
- Seite 123 127
- Active Blind Spot Detection 128
- Brake force display 129
- Active Protection 129
- Seite 126 130
- Function 131
- PostCrash 131
- The concept 132
- DTC Dynamic Traction 133
- HDC Hill Descent Control 134
- Adaptive Drive 135
- Dynamic Drive 135
- Dynamic Damping Control 135
- Integral Active Steering 136
- Driving Dynamics Control 136
- Seite 133 137
- Seite 134 138
- Seite 135 139
- Driving comfort 140
- Seite 137 141
- Seite 138 142
- Seite 139 143
- Desired speed 144
- Brief status display 144
- Indicator/warning lights 144
- Seite 141 145
- Cornering 146
- Driving away 146
- Radar sensor 146
- For US owners only 146
- Cruise control 147
- Seite 144 148
- PDC Park Distance Control 149
- Seite 146 150
- Surround View 151
- Rearview camera 151
- Seite 148 152
- Seite 149 153
- Side View 154
- Top View 155
- Seite 152 156
- Parking assistant 157
- Seite 154 158
- Seite 155 159
- Seite 156 160
- Climate control 161
- Seite 158 162
- Seite 159 163
- Ventilation 164
- Parked-car ventilation/ 165
- Seite 162 166
- New remote control 167
- Interior equipment 168
- Seite 165 169
- Sun visor 170
- Ashtray/cigarette lighter 170
- Connecting electrical 171
- Capacity 172
- Stowing the ski bag 172
- Storage compartments 173
- Front center armrest 174
- Clothes hooks 174
- Cupholders 175
- Storage compartments in the 175
- Driving tips 177
- Breaking-in period 178
- General driving notes 178
- Seite 175 179
- Seite 176 180
- Determining the load limit 181
- Stowing cargo 182
- Securing cargo 182
- Saving fuel 183
- Auto Start/Stop function 184
- Seite 181 185
- Seite 182 186
- Seite 183 187
- Seite 184 188
- Saving fuel Driving tips 189
- Mobility 191
- Refueling 192
- Observe the following when 193
- Fuel recommendation 194
- Seite 191 195
- Wheels and tires 196
- 100 mph/160 km/h 197
- 640i xDrive 197
- 650i xDrive 198
- Seite 196 200
- Tire identification marks 202
- Tire tread 203
- Tire damage 204
- Changing wheels and tires 204
- Seite 201 205
- Mobility System 206
- Sealing container 207
- Compressor 207
- Filling the tire with sealant 207
- Stowing the Mobility System 208
- Snow chains 209
- Activating the status 210
- Automatic detection 210
- Engine compartment 211
- Closing the hood 212
- Engine oil 213
- Adding engine oil 214
- Engine oil types to add 214
- Engine oil change: 215
- Coolant level 216
- Disposal 217
- Maintenance 218
- Socket for OBD Onboard 219
- Diagnosis 219
- Replacing components 220
- Light-emitting diodes (LEDs) 221
- Headlight glass 221
- Headlight setting 221
- LED headlights 221
- Seite 218 222
- Changing wheels 223
- Vehicle battery 223
- Seite 220 224
- Breakdown assistance 225
- Warning triangle 226
- First aid kit 226
- Jump-starting 227
- Tow-starting and towing 228
- Tow rope 229
- Tow fitting 229
- Screw thread for tow fitting 229
- Tow-starting 229
- Steptronic transmission 229
- Car washes 230
- Vehicle care 231
- Seite 228 232
- Safety belts 233
- Carpets and floor mats 233
- Sensor/camera lenses 233
- Displays/monitors 233
- Long-term 233
- Reference 235
- Technical data 236
- Seite 233 237
- Capacities 238
- Technical data Reference 239
- Everything from A to Z 240
- Seite 237 241
- Seite 238 242
- Seite 239 243
- Seite 240 244
- Seite 241 245
- Seite 242 246
- Seite 243 247
- Seite 244 248
- Seite 245 249
- *BL295449400D* 251
Inhaltsverzeichnis
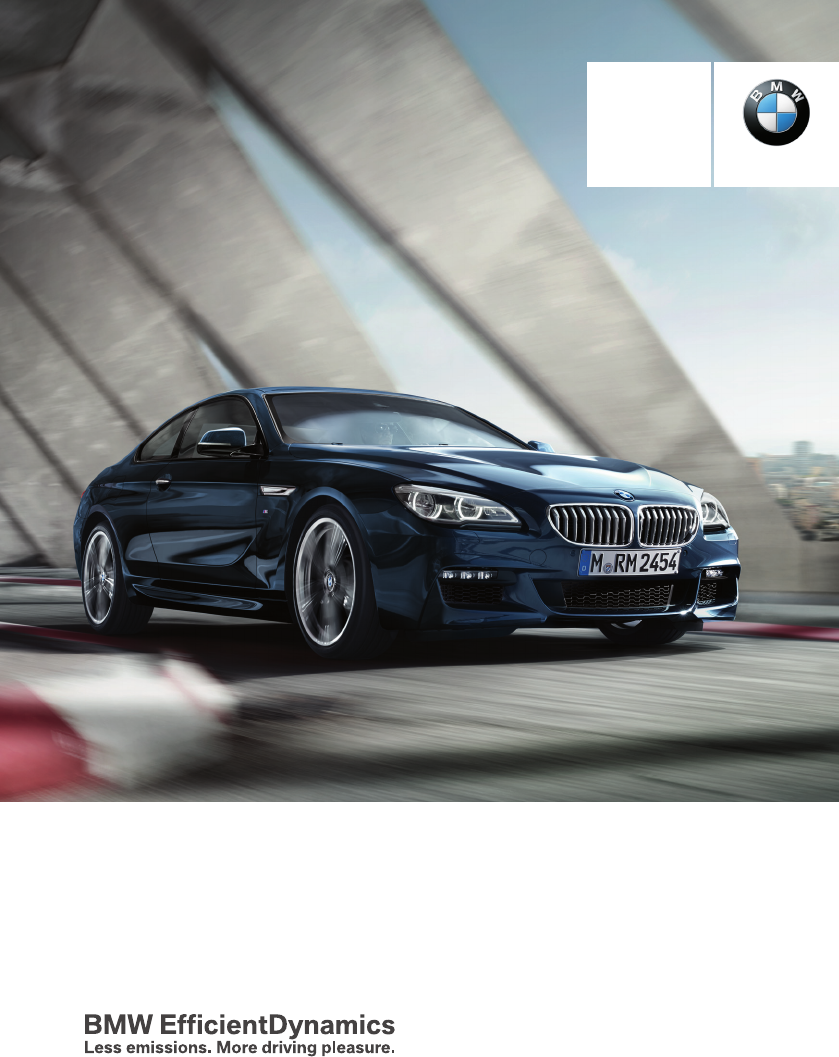
Owner's Manualfor VehicleThe UltimateDriving Machine®THE BMW 6 SERIES COUPE.OWNER'S MANUAL.ContentsA-ZOnline Edition for Part no. 01 40 2 95
NotesUsing this Owner's ManualOrientationThe fastest way to find information on a partic‐ular topic is by using the index.An initial overview of
LightsVehicle features and optionsThis chapter describes all standard, country-specific and optional features offered with theseries. It also describe
Headlight courtesy delay featureThe low beams stay lit for a short while afterthe radio-ready state is switched off if thelights are turned off and th
In tight curves, e.g., on mountainous roads orwhen turning, an additional, corner-illuminatinglamp is switched on that lights up the inside ofthe curv
Switching the high beams on and offmanually▷ High beams on, arrow 1.▷ High beams off/headlight flasher, arrow 2.The High-beam Assistant can be switche
Overview1 Interior lights2 Reading lampSwitching the interior lights on and offPress button.To reel off permanently: press the button forapprox. 3 sec
SafetyVehicle features and optionsThis chapter describes all standard, country-specific and optional features offered with theseries. It also describe
Knee airbagThe knee airbag supports the legs in a frontalimpact.Protective actionAirbags are not triggered in every impact situa‐tion, e.g., in less s
In case of a malfunction have airbag sys‐tem checked immediately.In case of a malfunction have airbag systemchecked immediately; otherwise, there is a
factured. After installing a child seat, makesure that the indicator lamp for the front-seatpassenger airbags lights up. This indicatesthat the child
Status control displayTire and system status are indicated by thecolor of the wheels and a text message on theControl Display.All wheels greenSystem i
On right-hand drive vehicles, some controlsare arranged differently from what is shown inthe illustrations.Status of the Owner'sManualBasic infor
Actions in the event of a flat tireNormal tires1. Identify the damaged tire.Do this by checking the air pressure in allfour tires.The tire pressure ga
▷ The tire inflation pressure has fallen belowthe level of the last confirmation.In this case:▷ Check the tire pressure and correct asneeded.▷ Carry o
that prevent the TPMS from functioning prop‐erly. Always check the TPMS malfunction tell‐tale after replacing one or more tires or wheelson your vehic
System limitsSudden tire damageSudden serious tire damage caused byexternal circumstances cannot be recognizedin advance.◀A natural, even tire inflati
Final tire failureVibrations or loud noises while drivingcan indicate the final failure of a tire. Reducespeed and stop; otherwise, pieces of the tire
Press button: the systems are turnedoff. The LED goes out.Press button: the systems are turned on. TheLED lights up.Settings can be made on the Contro
Tow-starting and towingFor tow-starting or towing, switch off theIntelligent Safety systems; otherwise malfunc‐tions of the individual braking systems
Warning with braking functionDisplayIf a collision with a recognized vehicle is immi‐nent a warning symbol appears in the instru‐ment cluster and in t
the mirror or the radar sensor is dirty or ob‐scured.▷ Up to 10 seconds after the start of the en‐gine, via the Start/Stop knob.▷ During calibration o
At a glanceButton in the vehicleIntelligent Safety buttonCameraThe camera is found near the interior rearviewmirror.Keep the windshield in the area be
chemicals known to the State of California tocause cancer and birth defects or other repro‐ductive harm. Battery posts, terminals and re‐lated accesso
Acute warnings can also be triggered withoutprevious prewarning.Braking interventionThe warning prompts the driver himself/herselfto react. During a w
lision with pedestrians and includes a brakingfunction.The camera in the area of the rearview mirrorcontrols the system.General informationIn daylight
CameraThe camera is found near the interior rearviewmirror.Keep the windshield in the area behind the in‐terior rearview mirror clean and clear.Switch
▷ If the driving stability control systems aredeactivated, e.g. DSC OFF.▷ If the camera viewing field or the frontwindshield are dirty or covered.▷ Up
▷ Detection of large animals: up to approx.490 ft/150 m▷ Detection of medium animals: up to ap‐prox. 230 ft/70 mEnvironmental influences can limit the
Adjustments via the iDriveWith heat image switched on:1. Press the controller.2. Select brightness or contrast.▷ Select the symbol.▷ Select the sy
Display in the Head-up DisplayThe warning is displayed simultane‐ously in the Head-up Display and onthe instrument cluster. The displayedsymbol can va
CameraThe camera is found near the interior rearviewmirror.Keep the windshield in the area behind the in‐terior rearview mirror clean and clear.Switch
Active Blind Spot DetectionThe conceptTwo radar sensors below the rear bumpermonitor the area behind and next to the vehicleat speeds above approx. 30
DisplayLamp in the exterior mirror housingInformation stageThe dimmed lamp in the exterior mirror hous‐ing indicates when there are vehicles in thebli
cluding the manufacturer, using special diag‐nostic tools. You can obtain further informationthere if you need it. After an error is corrected,the inf
▷ PreCrash▷ PostCrashAttentiveness assistantThe conceptThe system can detect increasing lack of alert‐ness or fatigue of the driver during long, mo‐no
NotePersonal responsibilityThe system cannot possibly serve as asubstitute for the driver's personal judgment ofthe traffic situation. The system
Driving stability control systemsVehicle features and optionsThis chapter describes all standard, country-specific and optional features offered with
Therefore, do not reduce the additional safetymargin by driving in a risky manner.◀Do not deactivate DSC when driving withroof loadDo not deactivate D
▷ When freeing vehicle from deep snow ordriving off from loose grounds.▷ When driving with snow chains.Deactivating/activating DTC DynamicTraction Con
Activating HDCPress button; the LED above the buttonlights up.Deactivating HDCPress button again and the LED goesout. HDC is automatically deactivated
COMFORT/ECO PROBalanced tuning.COMFORT+Comfort-oriented tuning of the shock absorb‐ers for optimal traveling comfort.Integral Active SteeringThe conce
OverviewButton in the vehicleOperating the programsPress button ProgramDSC OFFTRACTIONSPORT+SPORTCOMFORTCOMFORT+ECO PROAutomatic program changeThe sys
Indicator/warning lightsIf TRACTION is activated, TRACTION is dis‐played in the instrument cluster.The indicator lamp lights up: TRAC‐TION is activate
ECO PROECO PRO, refer to page 180, provides consis‐tent tuning to minimize fuel consumption formaximum range with maximum driving stabili‐zation.Comfo
wood, New Jersey 07675-1227, Telephone1-800-831-1117.If NHTSA receives similar complaints, it mayopen an investigation, and if it finds that asafety d
Driving comfortVehicle features and optionsThis chapter describes all standard, country-specific and optional features offered with theseries. It also
Before leaving the vehicle, secure itagainst moving on its own.Before leaving the vehicle with the engine run‐ning: set the parking brake and ensure t
The indicator lights in the instrument clusterlight up and the mark in the speedometer is setto the current speed.Cruise control can be used.Switch of
This is displayed in the speedometer andbriefly in the instrument cluster. Displays in theinstrument cluster, refer to page 140.When cruise control is
Displays in the instrument clusterDesired speed▷ The marking lights up green:the system is active.▷ The marking lights up or‐ange: the system has been
Displays in the Head-up DisplaySome system information can also be dis‐played in the Head-up Display.Distance informationThe symbol is displayed when
CorneringIf the desired speed is too high for a curve, thespeed is reduced slightly, although curves can‐not be anticipated in advance. Therefore, dri
Cruise controlThe conceptThe system maintains a preset speed via thebuttons on the steering wheel. The systembrakes on downhill gradients if engine br
Maintaining, storing, and changing thespeedHintsAdjusting the desired speedModify desired speed to road conditionsand be ready to brake at all times;
Brief status displaySelected desired speed.If --- appears briefly on the display for CheckControl messages, it is possible that the sys‐tem requiremen
Seite 11Notes11Online Edition for Part no. 01 40 2 954 494 - II/15
Switch the system back on if needed.With front PDC: switching on/offmanuallyPress button.▷ On: the LED lights up.▷ Off: the LED goes out.DisplaySignal
Low objects already displayed, e.g., curbs, canmove into the blind area of the sensors beforeor after a continuous tone sounds.False warningsPDC may i
CameraThe camera lens is located under the BMWemblem of the tail gate. The image quality maybe impaired by dirt. The camera calibrates it‐self regular
Turning circle lines▷ Turning circle lines can only be superim‐posed on the rearview camera image to‐gether with pathway lines.▷ They show the course
System limitsDetection of objectsVery low obstacles as well as high, protrudingobjects such as ledges may not be detected bythe system.Assistance func
Switch the system back on if needed.DisplayThe traffic area to the left and right is displayedon the Control Display.Guidelines at the bottom of the i
CamerasThe lenses of the Top View camera are locatedat the bottom in the mirror housings. The im‐age quality may be impaired by dirt.Clean the camera
track line is continuously adjusted for thesteering wheel movement. "Parking aid lines"Turning circle and pathway lines are displayed.Syste
▷ Maximum distance to row of parked vehi‐cles: 5 ft/1.5 m.Suitable parking space▷ Gap between two objects with a minimumlength of approx. 5 ft/1.5 m.▷
Display on the Control DisplaySystem activated/deactivatedSymbol Meaning Gray: the system is not available.White: the system is available butnot acti
Online Edition for Part no. 01 40 2 954 494 - II/15
▷ Possible on snow-covered or slippery roadsurfaces.▷ When there are obstacles that are hard toovercome, such as curbs.▷ When there are obstacles that
Climate controlVehicle features and optionsThis chapter describes all standard, country-specific and optional features offered with theseries. It also
HintsSufficient ventilationWhen remaining in the vehicle for an ex‐tended period of time, ensure sufficient exter‐nal ventilation. Do not continuously
Ice and condensation are quickly removedfrom the windshield and the front side win‐dows.For this purpose, point the side vents onto theside windows as
Residual heatThe heat stored in the engine is used to heatthe interior.Functional requirement▷ Up to 15 minutes after switching off theengine.▷ Warm e
Adjusting the ventilation▷ Ventilation for cooling:Direct vent in your direction when vehicle'sinterior is too hot.▷ Draft-free ventilation:Adjus
Preselecting the reel-on timeOn the Control Display:1. "Settings"2. "Climate"3. "Timer 1:" or "Timer 2:"4. Set
No rechargeable batteriesDo not use rechargeable batteries, sincedamage may result from the substances in thebatteries.◀1. Use a suitable object to un
Interior equipmentVehicle features and optionsThis chapter describes all standard, country-specific and optional features offered with theseries. It a
erases all programming of the buttons onthe interior rearview mirror.3. Hold the hand-held transmitter for the sys‐tem to be controlled approx. 1 to 3
At a glanceThese overviews of buttons, switches anddisplays are intended to familiarize you with yourvehicle. You will also become quickly acquaintedw
4. Likewise, press and hold the button of thedesired function on the hand-held trans‐mitter.5. Release both buttons as soon as the inte‐rior rearview
Switch off the ignition and take the remotecontrol with you when leaving the vehicle sothat children cannot use the lighter and burnthemselves.◀Replac
Ski bagCapacityThe ski bag makes it possible to transport twopairs of skis up to a length of 6 ft/2.10 m.Preparing and loading the ski bag1. Pull the
Storage compartmentsVehicle features and optionsThis chapter describes all standard, country-specific and optional features offered with theseries. It
▷ Do not use force when plugging the con‐nector into the USB interface.▷ Do not connect devices such as fans orlights to the USB interface.▷ Do not co
Two folding clothes hooks are provided in therear of the vehicle. To unfold them, press onthe top edge of the clothes hooks.CupholdersHintsShatter-pro
Online Edition for Part no. 01 40 2 954 494 - II/15
Driving tipsThis chapter provides you with informationuseful in dealing with specific driving andoperating modes.Online Edition for Part no. 01 40 2 9
Things to remember when drivingVehicle features and optionsThis chapter describes all standard, country-specific and optional features offered with th
Do not remove the heat shields installed andnever apply undercoating to them. Make surethat flammable materials, e. g. hay, leaves,grass, etc. do not
CockpitVehicle features and optionsThis chapter describes all standard, country-specific and optional features offered with theseries. It also describ
Objects within the range of movementof the pedalsNo objects in the area around the pedalsKeep floor mats, carpets, and any otherobjects out of the ped
LoadingVehicle features and optionsThis chapter describes all standard, country-specific and optional features offered with theseries. It also describ
LoadThe maximum load is the sum of the weight ofthe occupants and the cargo.The greater the weight of the occupants, theless cargo that can be transpo
Saving fuelVehicle features and optionsThis chapter describes all standard, country-specific and optional features offered with theseries. It also des
accelerating, shift up before reaching high en‐gine speeds.When you reach the desired speed, shift intothe highest applicable gear and drive with thee
OverviewThe system includes the followingEfficientDynamics functions and displays:▷ ECO PRO bonus range, refer to page 181.▷ ECO PRO tips driving inst
Efficiency displayDisplay in the instrument clusterDisplay in the instrument displayA mark in the efficiency display informs aboutthe current driving
Displaying fuel consumption historyThe average fuel consumption can be dis‐played within an adjustable time frame.Vertical bars show consumption for t
DisplayDisplay in the instrument clusterThe mark in the efficiency dis‐play below the tachometer isbacklit in blue and is located atthe zero point. Th
Seite 185Saving fuel Driving tips185Online Edition for Part no. 01 40 2 954 494 - II/15
Low beams 96Automatic headlight con‐trol 97Daytime running lights 97High-beam Assistant 98Instrument lighting 996 Steering column stalk, leftTurn
Online Edition for Part no. 01 40 2 954 494 - II/15
MobilityIn order to always ensure your mobility, you willfind important information on operating fluids,wheels and tires, maintenance and RoadsideAssi
RefuelingVehicle features and optionsThis chapter describes all standard, country-specific and optional features offered with theseries. It also descr
1. Open the cover on the right side trim.2. Pull the green knob with the fuel pumpsymbol. This releases the fuel filler flap.Observe the following whe
FuelVehicle features and optionsThis chapter describes all standard, country-specific and optional features offered with theseries. It also describes
gine deposits, it is highly recommended topurchase gasoline from Top Tier retailers.Failure to comply with these recommendationsmay result in the need
Wheels and tiresVehicle features and optionsThis chapter describes all standard, country-specific and optional features offered with theseries. It als
These pressure values can also be found onthe tire inflation pressure label on the driver'sdoor pillar.Maximum permissible speedDo not exceed 100
Tire size Pressure specificationsin bar/PSIFront: 245/35 R 2095 Y XL RSCRear: 275/30 R 2097 Y XL RSC2.6 / 38--2.6 / 38Emergency wheel:T 135/90 R 17 10
Tire inflation pressure values over100 mph/160 km/h640iWithout high-speed tuning featureTire size Pressure specificationsin bar/PSISpecifications inba
18 Open trunk lid 40All around the center console1 Control Display 182 Glove compartment 1693 Ventilation 1604 Hazard warning system 221Central l
Tire size Pressure specificationsin bar/PSISpecifications inbar/PSI with coldtires245/45 R 18 100 VM+S XL A/S RSC245/45 R 18 100 VM+S XL RSC2.4 / 35 2
Tire size Pressure specificationsin bar/PSISpecifications inbar/PSI with coldtires245/45 R 18 100 VM+S XL A/S RSC245/45 R 18 100 VM+S XL RSC2.2 / 32 2
Tire size Pressure specifica‐tions in bar/PSIFront: 245/40 R 1994 Y RSCRear:275/35 R 19 96 YRSC2.4 / 35--2.4 / 35Front: 245/35 R 2095 Y XL RSCRear:275
Uniform Tire Quality GradingQuality grades can be found where applicableon the tire sidewall between tread shoulderand maximum section width.For examp
Winter tiresDo not drive with a tire tread depth of less than0.16 in/4 mm.Below a tread depth of 0.16 in/4 mm, tires areless suitable for winter opera
Following tire damage, have the original wheeland tire combination remounted on the vehicleas soon as possible.Approved wheels and tiresYou should onl
StorageStore wheels and tires in a cool, dry place withas little exposure to light as possible.Always protect tires against all contact with oil,greas
Sealing container▷ Sealing container, arrow 1.▷ Filling hose, arrow 2.Observe use-by date on the sealant container.Compressor1 Holder for bottle2 Comp
4. Insert the sealant container on the com‐pressor housing in an upright position.5. Screw the filling hose of the sealant con‐tainer onto the tire va
This prevents leftover sealant from escap‐ing from the container.4. Wrap the empty sealant container in suita‐ble material to avoid dirtying the cargo
10 Driving Dynamics Control 132DSC Dynamic Stability Con‐trol 12811 Transmission selector leverAll around the roofliner1 Intelligent Emergency Re‐qu
When snow chains are in use, the rear axlesteering of the Integral Active Steering is deac‐tivated automatically.At speeds above the maximum permitted
Engine compartmentVehicle features and optionsThis chapter describes all standard, country-specific and optional features offered with theseries. It a
Never reach into the engine compart‐mentNever reach into spaces or gaps in the enginecompartment; otherwise, there is a risk of in‐jury, e.g., from ro
Engine oilVehicle features and optionsThis chapter describes all standard, country-specific and optional features offered with theseries. It also desc
Detailed measurementThe conceptIn the detailed measurement the engine oillevel is checked and displayed via a scale.Gasoline engine:If the engine oil
The engine oil quality is critical for the life ofthe engine.Suitable engine oil typesYou can add engine oils that meet the follow‐ing oil rating stan
CoolantVehicle features and optionsThis chapter describes all standard, country-specific and optional features offered with theseries. It also describ
Adding1. Let the engine cool.2. Turn the lid of the coolant reservoir slightlycounterclockwise to allow any excesspressure to dissipate, then open it.
MaintenanceVehicle features and optionsThis chapter describes all standard, country-specific and optional features offered with theseries. It also des
Socket for OBD OnboardDiagnosisNoteSocket for Onboard DiagnosisThe socket for onboard diagnostics mayonly be used by the service center or a work‐shop
iDriveVehicle features and optionsThis chapter describes all standard, country-specific and optional features offered with theseries. It also describe
Replacing componentsVehicle features and optionsThis chapter describes all standard, country-specific and optional features offered with theseries. It
the service center if you are unfamiliar those orif they have not been described here.You can obtain a selection of replacementbulbs at the service ce
LED front fog lightsThese front fog lights are made using LEDtechnology. Contact your service center in theevent of a malfunction.Turn signal in exter
16-watt bulb, W16W.1. Unscrew the bulb holder counterclockwise.2. Pull out the bulb and replace it.3. Mount the bulb holder and the cover of thetrunk
this may damage the vehicle battery due to anincreased power consumption.◀Starting aid terminalsIn the vehicle, only charge the battery via thestartin
Breakdown assistanceVehicle features and optionsThis chapter describes all standard, country-specific and optional features offered with theseries. It
When the emergency request is receivedat the BMW Response Center, the BMWResponse Center contacts you and takesfurther steps to help you.Even if you a
Jump-startingGeneral informationIf the battery is discharged, the engine can bestarted using the battery of another vehicleand two jumper cables. Only
corresponding engine or body ground ofthe vehicle to be started.Starting the engineNever use spray fluids to start the engine.1. Start the engine of t
Should it prove impossible to avoid mountingthe tow bar at an offset angle, please observethe following:▷ Maneuvering capability is limited goingaroun
1. Turn.2. Press.3. Move in four directions.Buttons on controllerPress button FunctionMENU Open the main menu.RADIO Opens the Radio menu.MEDIA Opens t
CareVehicle features and optionsThis chapter describes all standard, country-specific and optional features offered with theseries. It also describes
Before driving into a car washIn order to ensure that the vehicle can roll in acar wash, take the following steps:Steptronic transmission:1. Drive int
mediately to prevent the finish from being al‐tered or discolored.Only use respectively approved cleaning andcare products for vehicles with matte fin
No cleansers that contain alcohol or sol‐ventsDo not use cleansers that contain alcohol orsolvents, such as lacquer thinners, heavy-dutygrease remover
Online Edition for Part no. 01 40 2 954 494 - II/15
ReferenceThis chapter contains the technical data and anindex that will quickly take you to the informationyou need.Online Edition for Part no. 01 40
Technical dataVehicle features and optionsThis chapter describes all standard, country-specific and optional features offered with theseries. It also
Seite 233Technical data Reference233Online Edition for Part no. 01 40 2 954 494 - II/15Weights 640iApproved gross vehicle weight lbs/kg 4,870/2,209Loa
Capacities US gal/liters NotesFuel tank, approx. 18.5/70 Fuel quality, refer topage 190Seite 234Reference Technical data234Online Edition for Part no.
Seite 235Technical data Reference235Online Edition for Part no. 01 40 2 954 494 - II/15
Menu items in the Owner's ManualIn the Owner's Manual, menu items that can beselected are set in quotation marks, e.g.,"Settings".
Everything from A to ZIndexAABS, Antilock Brake Sys‐tem 128 ACC, Active Cruise Controlwith Stop & Go 136 Acceleration Assistant, referto Launch Co
Blinds, sun protection 46 BMW Assist, see user'smanual for Navigation, En‐tertainment and Communi‐cation BMW Driver’s Guide App 6 BMW Homepage 6
Condition Based ServiceCBS 214 Configure driving mode 135 Confirmation signal 43 ConnectedDrive, see user'smanual for Navigation, En‐tertainment
Energy recovery 87 Engine, automatic Start/Stopfunction 65 Engine, automatic switch-off 65 Engine compartment 207 Engine compartment, work‐ing in 207
Headlight courtesy delay fea‐ture via remote control 38 Headlight flasher 70 Headlight glass 217 Headlights 216 Headlights, care 227 Headlight washer
LEDs, light-emitting di‐odes 217 Length, vehicle 232 Letters and numbers, enter‐ing 24 License plate lamp, bulb re‐placement 218 Light alloy wheels, c
Oil additives 210 Oil change 211 Oil change interval, servicerequirements 87 Oil filler neck 210 Oil types, alternative 211 Oil types, approved 211 Ol
RON recommended fuelgrade 190 Rope for tow-starting/towing 224 RSC Run Flat System Com‐ponent, refer to Run-flattires 202 Rubber components,care 228 R
Switch-on times, parked-carventilation 162 Switch, refer to Cockpit 14 Symbols 6 Symbols in the status field 22 SYNC program, automatic cli‐mate contr
WWarning and indicator lamps,see Check Control 81 Warning displays, see CheckControl 81 Warning messages, seeCheck Control 81 Warning triangle 222 War
Function is deactivated.TouchpadSome iDrive functions can be operated usingthe touchpad on the controller:Selecting functions1. "Settings"
More about BMWbmwusa.comThe UltimateDriving Machine®01 40 2 954 494 ue*BL295449400D*Online Edition for Part no. 01 40 2 954 494 - II/15
4. Turn the controller until "Time/Date" ishighlighted, and then press the controller.5. Turn the controller until "Time:" is high
Additional symbolsSymbol Meaning Spoken instructions are turned off.Split screenGeneral informationAdditional information can be displayed on therigh
Deleting personal in thevehicleThe conceptDepending on the usage, the vehicle savespersonal data, such as stored radio stations.These personal data ca
▷ Target search: names of locations may beentered in languages available throughControl Display.Seite 25iDrive At a glance25Online Edition for Part no
6 SeriesOwner's Manual for VehicleThank you for choosing a BMW.The more familiar you are with your vehicle, the better controlyou will have on th
Voice activation systemVehicle features and optionsThis chapter describes all standard, country-specific and optional features offered with theseries.
Executing functions using shortcommandsExecute functions on the main menu via shortcommands. It almost doesn't matter whichmenu item is selected,
This can unnecessarily delay the establish‐ment of a phone connection.Instead, use the SOS button, refer topage 221, close to the interior mirror.Envi
Integrated Owner's Manual in the vehicleVehicle features and optionsThis chapter describes all standard, country-specific and optional features o
Context help - Owner's Manual to thetemporarily selected functionYou may open the relevant information di‐rectly.Opening via the iDriveTo move di
Seite 31Integrated Owner's Manual in the vehicle At a glance31Online Edition for Part no. 01 40 2 954 494 - II/15
Online Edition for Part no. 01 40 2 954 494 - II/15
ControlsThis chapter is intended to provide you withinformation that will give you complete control ofyour vehicle. All features and accessories thata
Opening and closingVehicle features and optionsThis chapter describes all standard, country-specific and optional features offered with theseries. It
Replacing the battery1. Remove integrated key from remote con‐trol.2. Push in the catch with the key, arrow 1.3. Remove the cover of the battery compa
© 2015 Bayerische Motoren WerkeAktiengesellschaftMunich, GermanyReprinting, including excerpts, only with the writtenconsent of BMW AG, Munich.US Engl
meantime by a person with a different remotecontrol.Changes to the settings are automaticallysaved in the personal profile.Three personal profiles and
other vehicle equipped with the Personal Pro‐file function.The following export options are available:▷ Via BMW Online.▷ Via the USB port to a USB dev
The windows are opened, the glass sunroof istilted and the sliding visor moves back, as longas the button on the remote control is pressed.LockingLock
Do not transport the remote control togetherwith metal objects or electronic devices.In the case of interference, the vehicle can alsobe unlocked and
From the insideUnlocking and lockingPressing the central locking system buttonlocks or unlocks the vehicle with the doorsclosed.The vehicle is not sec
ClosingRecessed grips in the interior trim of the trunklid make it easier to pull down the lid.Locking separatelyThe trunk lid can be locked separatel
LockingTouch the surface on the handle of a vehicledoor, arrow, with your finger for approx. 1 sec‐ond without grasping the door handle.This correspon
Doors1. "Settings"2. "Doors/key"3. Select the symbol.4. Select the desired function:▷ "Driver's door only"Only th
Alarm systemThe conceptWhen the vehicle is locked, the vehicle alarmsystem responds to:▷ Opening a door, the hood or the trunk lid.▷ Movements in the
Avoiding unintentional alarmsThe tilt alarm sensor and interior motion sen‐sor can be switched off together, such as inthe following situations:▷ In a
AddendumADDENDUM TO OWNER'S MANUALWe wanted to provide you with some updates and clarifications with respect to the printed BMW Owner's Manu
Pinch protection systemDanger of jamming even with pinch pro‐tectionEven with the pinch protection system, checkthat the window's closing path is
Tilting up and closing glass sunroof▷ Push switch briefly upward.The closed glass sunroof istilted and the sliding visoropens slightly.▷ Briefly press
roof and sliding visor arecompletely closed.▷ The glass sunroof closes without jam pro‐tection.Seite 48Controls Opening and closing48Online Edition fo
AdjustingVehicle features and optionsThis chapter describes all standard, country-specific and optional features offered with theseries. It also descr
Adjustments in detail1. Forward/back.2. Height.3. Seat tilt.4. Backrest tilt.Thigh supportMultifunctional seatAdjust the position using the lever.Lumb
Shoulder supportAlso supports the back in the shoulder area:▷ Results in a relaxed seating position.▷ Reduces strain on the shoulder muscles.Active se
Switching onPress button once for each ventilationlevel.The highest level is active when three LEDsare lit.After a short time, the system automaticall
Unbuckling the belt1. Hold the belt firmly.2. Press the red button in the belt buckle.3. Guide the belt back into its roll-up mecha‐nism.Safety belt r
Adjusting the heightAdjusting electrically.Distance to the back of the head▷ Forward: pull.▷ Back: press the button and push the headrestraint toward
Controls▷ Press and hold this button until the seathas moved to the desired position. Releas‐ing the button stops window/roof move‐ment.▷ Press button
Addendumby it as appropriate for use in your vehicle and that can be properly fixed in place.”10. At page 180, under the heading: “Have maintenance ca
Safety mode1. Close the driver's door or reel on the igni‐tion.2. Press and hold the desired button 1 or 2until the adjustment procedure is com‐p
Activating1. Slide the switch to the driver's sidemirror position.2. Engage selector lever position R.DeactivatingSlide the switch to the passen
AdjustingThe steering wheel can be adjusted in four di‐rections.Storing the positionSeat, mirror, and steering wheel memory, referto page 55.Assistanc
Transporting children safelyVehicle features and optionsThis chapter describes all standard, country-specific and optional features offered with these
of unexpected movement of the seat back‐rest.◀On the front passenger seatDeactivating airbagsDeactivating the front-seat passengerairbagsIf a child re
LATCH child restraint systemLATCH: Lower Anchors and Tether for Chil‐dren.NoteFollow manufacturer's information forLATCH child restraint systemsT
1 Direction of travel2 Upper retaining strap3 Head restraint4 Rear window shelf5 Mounting point/eye6 Hook for upper retaining strapAttaching the upper
DrivingVehicle features and optionsThis chapter describes all standard, country-specific and optional features offered with theseries. It also describ
The radio-ready state remains active if, e.g.,the ignition is automatically switched off for thefollowing reasons:▷ Opening or closing the driver&apos
Auto Start/Stop functionThe conceptThe Auto Start/Stop function helps save fuel.The system switches off the engine during astop, e.g., in traffic cong
AddendumThe manufacturer of your vehicle recom-mends that you use vehicle batteries that it has tested and recommends for use in your vehicle; otherwi
▷ The hood was unlocked.Some indicator lights light up for a variedlength of time.The engine can only be started via the Start/Stop button.Functional
OverviewParking brakeSettingApply parking brake and further securethe vehicle if needed.Set the parking brake firmly when parking; oth‐erwise, the veh
OverviewAutomatic HoldSafety informationSecure the vehicle against rollingBefore leaving the vehicle with the en‐gine running, engage position P of th
Automatic Hold remains activated during theengine stop brought about by the Auto Start/Stop function.Take the remote control with youTake the remote c
High beams, headlight flasher▷ High beams, arrow 1.▷ Headlight flasher, arrow 2.Washer/wiper systemSwitching the wipers on/off and briefwipeHintsDo no
Activating/deactivatingPress button on the wiper lever.Wiping is started. If the vehicle is equippedwith a rain sensor: LED in wiper lever lights up.W
Folding wipers back downBefore switching the ignition on, fold thewipers back down to the windshield; other‐wise, the wipers may become damaged whenth
When the ignition is switched off, refer topage 63, selector lever position P is engagedautomatically.P ParkSelect only when the vehicle is stationary
Sport program and manual modeActivating the sport programPress the selector lever to the left out of selec‐tor lever position D.The engaged gear is di
If the shift paddles on the steering wheel areused to shift gears in automatic mode, thetransmission temporarily switches to manualmode.In the manual
A flag symbol is displayed in the instru‐ment cluster.5. The starting engine speed adjusts. Within3 seconds, release the brake.Before using Launch Con
DisplaysVehicle features and optionsThis chapter describes all standard, country-specific and optional features offered with theseries. It also descri
▷ Messages, e.g. Check Control, refer topage 81.▷ Current fuel consumption, refer topage 86.▷ Navigation display, see User's manual forNavigation
7 Computer 90 8 Reset miles 85Switching the change of display on and offYou can set whether the instrument displayautomatically changes to the ECO P
3 Efficiency display 1804 Transmission display5 ▷ Blue: bonus range▷ Gray: rangeIn the ECO PRO program the instrument dis‐play switches to the ECO PR
General informationSteptronic Sport transmission: shift lights areshown, when the SPORT+ driving program isactivated.Switching on shift lightsSteptron
Brake systemContinue to drive moderately.Have the vehicle checked by the serv‐ice center immediately.Front-end collision warningIlluminated: advance w
Flat Tire Monitor FTMThe Flat Tire Monitor signals a loss oftire inflation pressure in a tire.Reduce your speed and stop cau‐tiously. Avoid sudden bra
Cruise controlThe system is switched on. It maintainsthe speed that was set using the con‐trol elements on the steering wheel.Automatic HoldThe vehicl
Displaying stored Check ControlmessagesOn the Control Display:1. "Vehicle info"2. "Vehicle status"3. "Check Control"4.
ContentsThe fastest way to find information on a partic‐ular topic or item is by using the index, refer topage 236.6 NotesAt a glance14 Cockpit18 iDri
Therefore, drive carefully on bridges andshaded roads, e.g., to avoid the increased riskof an accident.◀TimeThe time is displayed at the bot‐tom of th
Energy recoveryDisplayThe kinetic energy of the vehicleis converted to electrical energywhile coasting. The vehicle bat‐tery is partially charged and
Gear shift indicatorThe conceptThe system recommends the most fuel effi‐cient gear for the current driving situation.Depending on the vehicle's f
Speed limit detectionCurrent speed limit.Speed limit detection is notavailable.Speed limit detection can also be displayed inthe Head-up Display.Syste
Using the thumbwheel, select the desired set‐ting and confirm it by pushing the thumbwheel.On-board computerIndication in the info displayThe informat
Resetting average valuesPress and hold the onboard computer buttonon the turn signal lever.Distance to destinationThe distance remaining to the destin
Displaying, setting or changing thespeed warningOn the Control Display:1. "Settings"2. "Speed"3. "Warning at:"4. Turn th
5. Press the controller.6. Make the necessary settings for the monthand year.The date is stored.Setting the date format1. "Settings"2. "
▷ Unfavorable light conditions.If the image is distorted, check the basic set‐tings.Switching on/offPress button.DisplayOverview▷ Speed.▷ Navigation s
Therefore, have the special windshield re‐placed by a service center only.Seite 95Displays Controls95Online Edition for Part no. 01 40 2 954 494 - II/
Weitere Dokumente für Autos BMW 640i

Verwandte Produkte und Handbücher für Autos BMW 640i
 (256 Seiten)
(38 Seiten)
(230 Seiten)
(251 Seiten)
(247 Seiten)
(54 Seiten)
(54 Seiten)
(218 Seiten)
(54 Seiten)
(53 Seiten)
(46 Seiten)
(54 Seiten)
(282 Seiten)
(49 Seiten)
(186 Seiten)
(47 Seiten)
(46 Seiten)
(268 Seiten)
(234 Seiten)
(256 Seiten)
(38 Seiten)
(230 Seiten)
(251 Seiten)
(247 Seiten)
(54 Seiten)
(54 Seiten)
(218 Seiten)
(54 Seiten)
(53 Seiten)
(46 Seiten)
(54 Seiten)
(282 Seiten)
(49 Seiten)
(186 Seiten)
(47 Seiten)
(46 Seiten)
(268 Seiten)
(234 Seiten)
© 2020, manymanuals.de. Alle Rechte vorbehalten. | 0.858 s |
 Manymanuals.com
 Manymanuals.de
 Manymanuals.fr
 Manymanuals.it
 Manymanuals.pl
 Manymanuals.cz
 Manymanuals.es
 Manymanuals-pt.com
Kommentare zu diesen Handbüchern